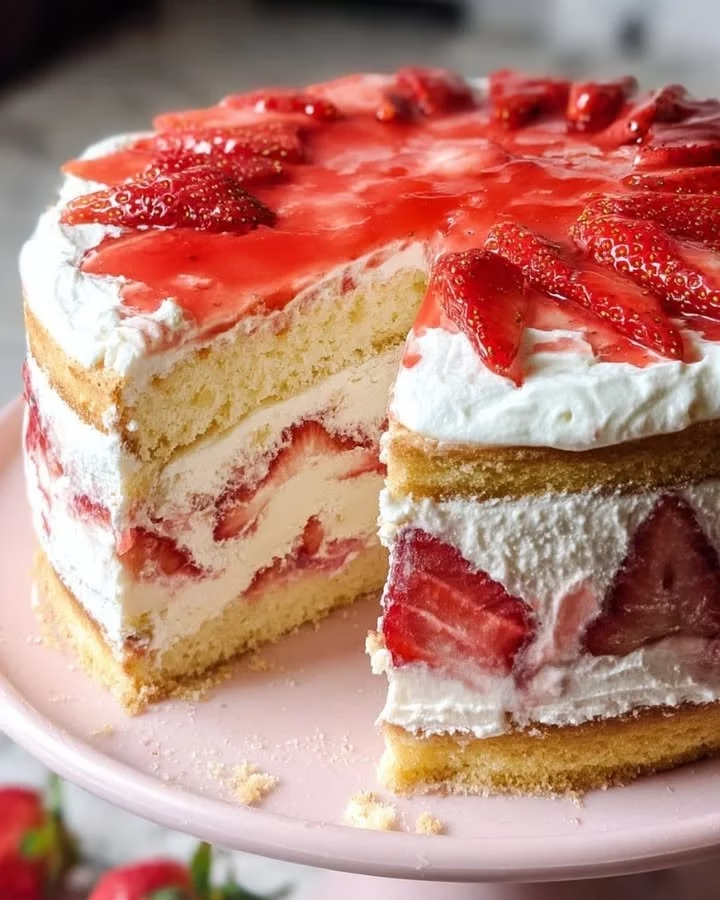
Strawberry Shortcake Layer Cake: A Sweet Summer Slice of Joy
When it comes to showstopping desserts, nothing represents sunny days quite like a luscious Strawberry Shortcake Layer Cake. Perfect for birthdays, picnics, or just because it’s Tuesday, this cake is a delightful way to indulge your sweet tooth while bringing smiles to your loved ones. And let’s be real, who wouldn’t want to serve a towering, fluffy cake layered with fresh strawberries and whipped cream? This recipe is a crowd-pleaser and is surprisingly simple to whip up, regardless of your baking prowess!
So, grab your apron and let’s embark on this delicious adventure together!
Why You’ll Love This Strawberry Shortcake Layer Cake
The great thing about this Strawberry Shortcake Layer Cake is that it combines classic comfort with a touch of elegance—perfect for impressing guests or just enjoying at home. It’s great for busy weeks when you need a sweet fix but don’t have all day to bake. Plus, the freshness of the strawberries screams summer, making it ideal for that backyard barbecue or garden party.
Ingredients
Before we dive into the how-to, let’s gather our ingredients. Here’s what you’ll need:
For the Cake:
- 2 cups all-purpose flour
- 1 cup granulated sugar
- 1/2 cup unsalted butter, softened
- 1 cup milk
- 3 1/2 teaspoons baking powder
- 1 teaspoon vanilla extract
- 1/2 teaspoon salt
- 3 large eggs
For the Strawberry Filling:
- 2 cups fresh strawberries, hulled and sliced
- 1/4 cup sugar
- 1 tablespoon lemon juice
For the Whipped Cream:
- 2 cups heavy cream
- 1/4 cup powdered sugar
- 1 teaspoon vanilla extract
Steps to Create Deliciousness
Now for the fun part—making the cake! Follow these steps, and you’ll be well on your way to becoming the star of your next gathering.
Preheat Your Oven: Get the oven fired up to 350°F (175°C). This is where the magic happens!
Prepare the Cake Batter: In a large mixing bowl, beat the softened butter and sugar together until fluffy. It should be light and creamy—like a cloud in cupcake form.
Combine Other Ingredients: Add the eggs, milk, vanilla, and mix well. Gradually sift in the flour, baking powder, and salt. Blend until just combined. Remember, a little lumpy is great; overmixing is the enemy here!
Bake the Layers: Divide the batter evenly into two greased 9-inch round cake pans (or one cake if you’re feeling brave!). Bake for about 25-30 minutes, or until a toothpick comes out clean. Let them cool in the pans for about 10 minutes before transferring to a wire rack to cool completely.
Prepare the Strawberry Filling: While the cake layers are cooling, toss the sliced strawberries with sugar and lemon juice in a bowl. Let it sit at room temperature to create a sweet, syrupy goodness.
Whip the Cream: In a chilled bowl, beat the heavy cream, powdered sugar, and vanilla extract until soft peaks form. This step is critical—over-whipped cream turns into butter, and while that’s also delightful in its own right, it’s not what we’re going for today!
Assemble Your Masterpiece: Once your cake layers are completely cool, place one layer on a cake plate. Spread a layer of whipped cream over the top, followed by a layer of strawberries. Place the second cake layer on top, and repeat the process. Finish with whipped cream and decorate with any remaining strawberries for a picture-perfect finish!
Chill and Serve: Pop it in the fridge for about an hour before slicing. This will help everything set beautifully and make serving a breeze.
Cooking Tips
Don’t Fear the Lumps: If your cake batter is lumpy, embrace it! Sometimes the best things in life aren’t perfectly smooth.
Extra Strawberries?: If you have leftover strawberries after assembling, chop them up and throw them into some yogurt or oatmeal for a delightful breakfast treat.
Make Ahead: The cake layers can be baked a day or two in advance. Just wrap them tightly and store at room temperature. The flavors actually meld together beautifully!
FAQs About Strawberry Shortcake Layer Cake
Can I substitute the strawberries? Absolutely! Feel free to experiment with other berries, like blueberries or raspberries. Each offers its unique twist on this classic.
How can I store leftovers? Keep any leftovers covered in the fridge. It’s best enjoyed within a couple of days, as the cake can get a bit soggy.
Is this cake suitable for special diets? You can make a gluten-free version by using a gluten-free flour blend, and for dairy-free adjustments, try almond milk and coconut cream!
Now, isn’t it wonderful to know that a homemade Strawberry Shortcake Layer Cake is just a few mixing bowls away? The joy of baking is not just about the final product but the memories and happiness created along the way. So bake, share, and enjoy this sweet labor of love with friends and family.
Let me know how your cake turns out! Don’t forget to tag your delicious creations on social media—because nothing says "look at me" quite like a showstopping dessert!
Sweet treats await!
Meta Description:
Strawberry Shortcake Layer Cake is the perfect recipe for summer gatherings. Quick, easy, and delicious, this cake will become your go-to dessert. Try it today!
For more sweet inspiration, visit my other delicious dessert recipes, or check out my tips for selecting the best strawberries at Seasonal Fruits Guide!
Strawberry Shortcake Layer Cake
Ingredients
Method
- Preheat your oven to 350°F (175°C).
- In a large mixing bowl, beat the softened butter and sugar together until fluffy.
- Add the eggs, milk, and vanilla, mixing well.
- Gradually sift in the flour, baking powder, and salt. Blend until just combined.
- Divide the batter evenly into two greased 9-inch round cake pans. Bake for about 25-30 minutes, until a toothpick comes out clean.
- Let them cool in the pans for about 10 minutes before transferring to a wire rack to cool completely.
- While the cake layers are cooling, toss the sliced strawberries with sugar and lemon juice in a bowl. Let sit at room temperature.
- In a chilled bowl, beat heavy cream with powdered sugar and vanilla until soft peaks form.
- Once the cake layers are completely cool, place one layer on a cake plate.
- Spread a layer of whipped cream over the top, followed by a layer of the strawberry mixture.
- Place the second cake layer on top and repeat the process.
- Finish with whipped cream and decorate with remaining strawberries.
- Refrigerate for about an hour before slicing.