Quick and Easy Bread: A No-Fuss Loaf for Busy Weeknights
There are days when you want warm, homemade bread but barely enough time to text your sister back. Enter Quick and Easy Bread — a no-knead, forgiving loaf that feels like a tiny kitchen miracle. If you’re juggling work, family, and the never-ending laundry pile (you’re not alone), this recipe gives you the comfort of bakery-style bread with almost no drama. And if you need a simple dinner pairing, try it with this speedy easy chicken stir fry for a weeknight win.
I’m Anna — one half of a sister-led kitchen adventure — and Patricia and I love transforming pantry staples into meals that bring people to the table. This Quick and Easy Bread has become a staple when I want something warm and satisfying without a multi-step process. Let’s get into it.
Why You’ll Love This Quick and Easy Bread
- Fast prep: about 5–10 minutes of active time.
- No kneading: save your wrists and your patience.
- Crusty outside, soft inside: just like a bakery loaf.
- Picky eaters approve: slice it, dunk it, or make sandwiches.
Ingredients
- 3 cups (360 g) all-purpose flour, plus extra for dusting
- 1 1/2 teaspoons salt
- 1 teaspoon instant yeast (or active dry yeast)
- 1 1/2 cups (360 ml) warm water (about 100–110°F / 38–43°C)
- 1 tablespoon olive oil (optional, for softer crust)
- 1 teaspoon sugar or honey (optional, helps yeast if using active dry yeast)
Notes on ingredients
- Instant yeast is a little speedier and can be mixed directly into the flour. If using active dry yeast, sprinkle it into the warm water with sugar and let bloom 5–10 minutes until foamy.
- Want whole wheat? Swap up to 1 cup of flour for whole wheat for a nutty flavor, but add a splash more water if the dough looks tight. This recipe loves a bit of flexibility—just don’t go overboard.
Quick and Easy Bread: Step-by-Step Instructions
Mix dry ingredients. In a large bowl, whisk together the flour, salt, and instant yeast. If you’re using active dry yeast and it’s already bloomed in water, hold the yeast out of the dry mix for now.
Add water and oil. Pour in the warm water (and the olive oil if using). Stir with a wooden spoon or spatula until the mixture forms a shaggy, sticky dough. It will be wetter than traditional bread dough—this is normal and exactly what gives you that rustic crumb.
First rise. Cover the bowl loosely with plastic wrap or a clean kitchen towel. Let it rise at room temperature for 45–60 minutes, until puffy and slightly domed. If you’re short on time, a warm oven (turned off) or sunny counter will speed things up a bit.
Preheat your pot and oven. About 30 minutes into the rise, place a 4-6 quart Dutch oven (or heavy oven-safe pot with lid) into a cold oven and preheat to 450°F (230°C). Yes, put the pot in cold and let it heat up with the oven—this helps form the crust.
Shape (minimal). Dust a piece of parchment with flour. Turn the dough gently onto the parchment. Using floured hands, fold the dough once or twice to form a loose ball. Don’t overwork it.
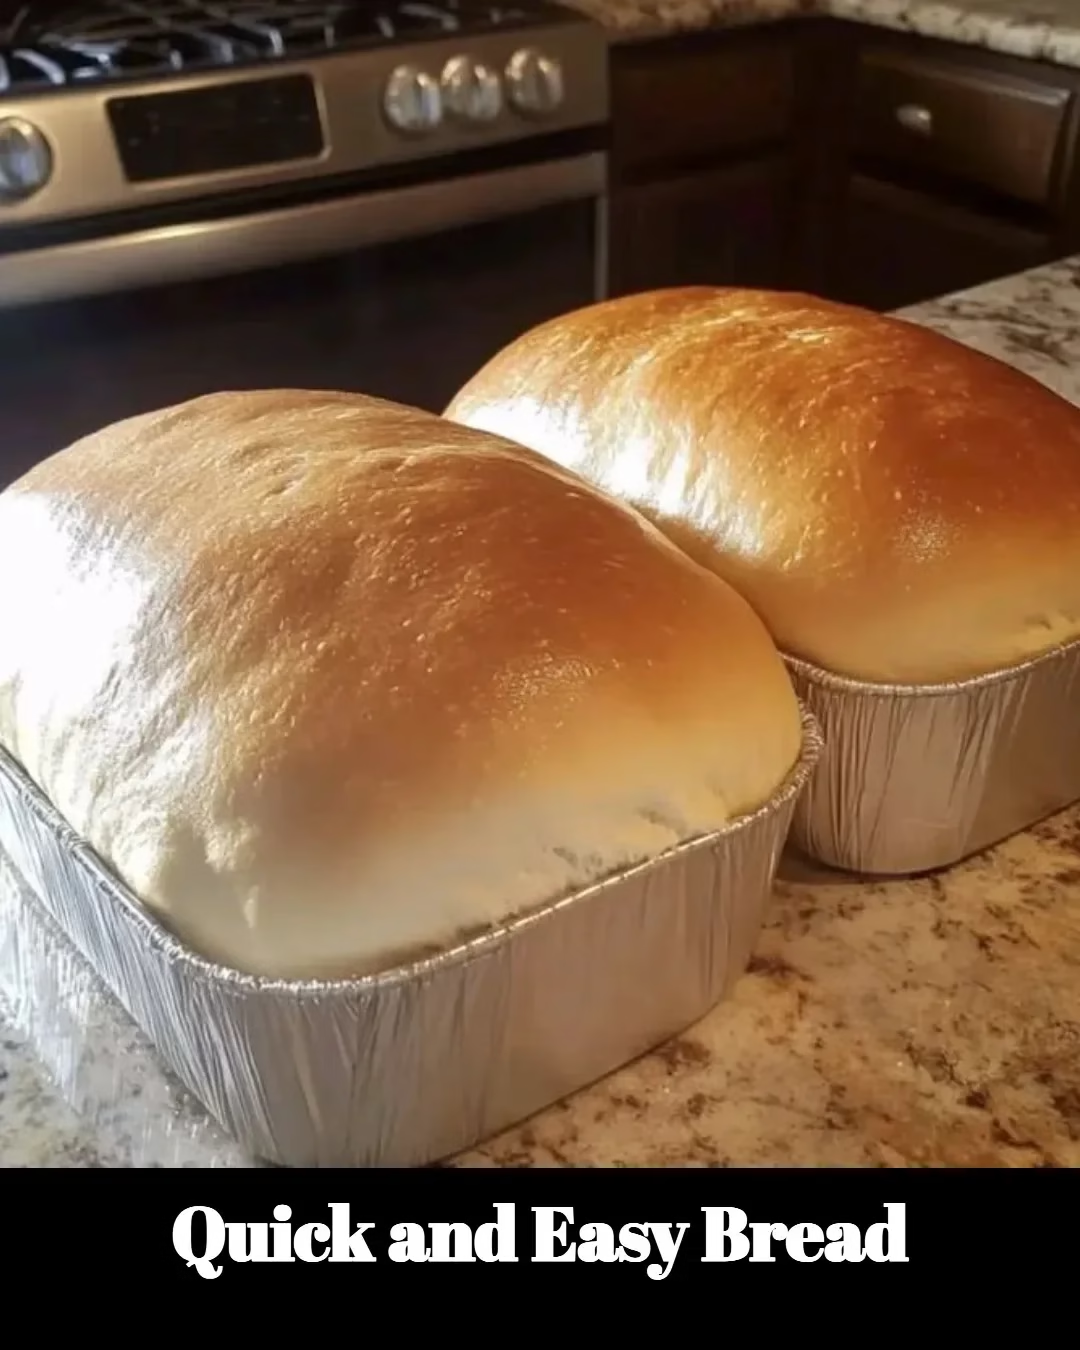
Bake in the preheated pot. Carefully lift the dough on the parchment and lower it into the hot pot. Cover and bake for 30 minutes. Remove the lid and bake an additional 10–12 minutes until deeply golden.
Cool and enjoy. Lift the bread from the pot using the parchment and let it cool on a rack for at least 20 minutes before slicing. I know—it’s tempting to cut immediately, but waiting helps the crumb set.
Easy Variations
- Garlic-herb: Mix 1–2 tsp dried Italian seasoning and 1 tsp garlic powder into the flour. Brush the finished loaf with melted butter and minced garlic.
- Cheese-studded: Fold in 1 cup shredded sharp cheddar or parmesan before the first rise for irresistible melty pockets.
- Sweet twist: Add 2 tbsp honey and a handful of raisins for a quick breakfast loaf.
Cooking Tips (so your loaf behaves)
- The dough is sticky by design. Don’t add too much extra flour—slightly sticky dough gives better texture.
- If you don’t have a Dutch oven, use any oven-safe pot with a tight lid or place a metal bowl over the dough on a baking sheet to trap steam.
- For a shinier crust, brush the loaf with a thin layer of olive oil or butter right after baking.
- Use parchment paper for easy transfer in and out of the pot—no heroic maneuvers required.
- If your oven runs cold, bake an extra 5–8 minutes uncovered; if it runs hot, reduce the uncovered time slightly.
A Little Kitchen Story (from my heart)
I first made this bread on a chaotic weekday—the kind with school drop-off, conference calls, and the dog deciding 6 a.m. was party time. Patricia was visiting that week, and we wanted something warm to go with soup. We mixed, we waited, and the house filled with that comforting yeast smell. Our kids declared it “better than store-bought,” which, frankly, is high praise. Ever since, this loaf is my go-to when I want something homey but don’t have hours to bake.
Quick Serving Ideas
- Split, toast, and spread with butter and jam for a cozy breakfast.
- Make sandwiches for lunch—this bread holds up to hearty fillings.
- Serve with soups or stews for a dinner that feels pulled together even if you didn’t start until 5 p.m.
- Turn day-old slices into croutons or breadcrumbs. Nothing wasted here.
FAQ: Your Quick Questions Answered
Q: Can I make this with whole wheat flour?
A: Yes—swap up to 1 cup of whole wheat flour; add a little extra water if the dough feels too stiff. The loaf will be heartier and denser.
Q: What if I don’t have a Dutch oven?
A: Use any heavy oven-safe pot with a lid or a baking sheet covered loosely with a large metal bowl. The idea is to trap steam for that crisp crust.
Q: Can I use active dry yeast instead of instant?
A: Absolutely. Dissolve active dry yeast in warm water with a teaspoon of sugar and let it foam for 5–10 minutes, then proceed.
Q: How do I store leftover bread?
A: Keep it loosely wrapped at room temperature for up to 2 days. For longer storage, slice and freeze portions; toast straight from the freezer.
Q: Can I make the dough ahead?
A: Yes! After mixing, cover and refrigerate for up to 24 hours. Bring it to room temp and let it rise a bit before baking. This slow-rise adds flavor and convenience.
Why this is perfect for busy American families
Plain and simple: it’s a fast way to get homemade bread on the table without complicated steps. For moms or professionals who have a finite amount of evening energy, this recipe rewards you with impressive, bakery-style results for minimal effort. If you love practical, weeknight-friendly recipes, you might also enjoy this collection of 5 easy stuffed peppers recipes for a delicious and simple meal—they’re a staple in my rotation when the loaf is cooling and dinner needs to happen, pronto.
Safety and substitutions
- If you’re watching salt intake, reduce salt to 1 teaspoon and add herbs for flavor.
- Gluten-free? This recipe needs more adjustments than a simple swap—try a dedicated gluten-free no-knead recipe for best results. (If you want, I can share a gluten-free version next time.)
A bit of humor (because baking should be fun)
If your first loaf looks like a lopsided moon rather than a professional boule, congratulations—you’ve achieved character. Bread has personality, and so do we. It still tastes wonderful, and your family will probably love the “handmade charm.”
Serving and presentation tips
- Slice with a serrated knife for clean cuts.
- Warm a few slices in butter for company—trust me, it’s a crowd-pleaser.
- Pair with a simple salad, roasted chicken, or a big pot of soup for dinner that feels like love in carb form. If you want a quick chicken dinner to pair with the loaf, check out my speedy easy chicken stir fry recipe for a balanced weeknight meal.
Want to level up?
- Add seeds on top: brush with water and sprinkle sesame or poppy seeds before baking.
- Serve with compound butter: mix softened butter with herbs, lemon zest, or honey for a fast, elegant spread.
Final loaf thoughts
This Quick and Easy Bread is the kind of recipe that makes your kitchen smell like comfort and gives you a small, satisfying win on busy days. It’s forgiving, flexible, and surprisingly impressive for how little effort it takes. Whether you’re baking for family nights, a casual dinner party, or just because you want warm bread now, this loaf has your back.
Conclusion
If you’re curious about other quick artisan-style methods, take a peek at the 5 Minute Artisan Bread Recipe – Food.com for a slightly different fast approach. For another take on easy, crusty no-knead loaves, the World’s Easiest Yeast Bread recipe – RecipeTin Eats is a great reference and inspiration. Both are fun reads if you want to compare techniques and find the perfect quick bread method for your kitchen.
Meta description (150 characters)
Quick and Easy Bread: a fast, foolproof no-knead loaf for busy weeknights. Soft, crusty, and ready in one hour—perfect for family dinners. Get baking!
Quick and Easy Bread
Ingredients
Method
- In a large bowl, whisk together the flour, salt, and instant yeast. If using active dry yeast, hold the yeast out of the dry mix for now.
- Pour in the warm water and olive oil if using. Stir with a wooden spoon until the mixture forms a shaggy, sticky dough.
- Cover the bowl loosely with plastic wrap or a kitchen towel. Let it rise at room temperature for 45–60 minutes, until puffy.
- About 30 minutes into the rise, place a Dutch oven in the cold oven and preheat to 450°F (230°C).
- Dust a piece of parchment with flour. Turn the dough gently onto the parchment and fold to form a loose ball.
- Carefully lift the dough on the parchment and lower it into the hot pot. Cover and bake for 30 minutes.
- Remove the lid and bake an additional 10–12 minutes until deeply golden.
- Lift the bread from the pot using parchment and let it cool on a rack for at least 20 minutes before slicing.