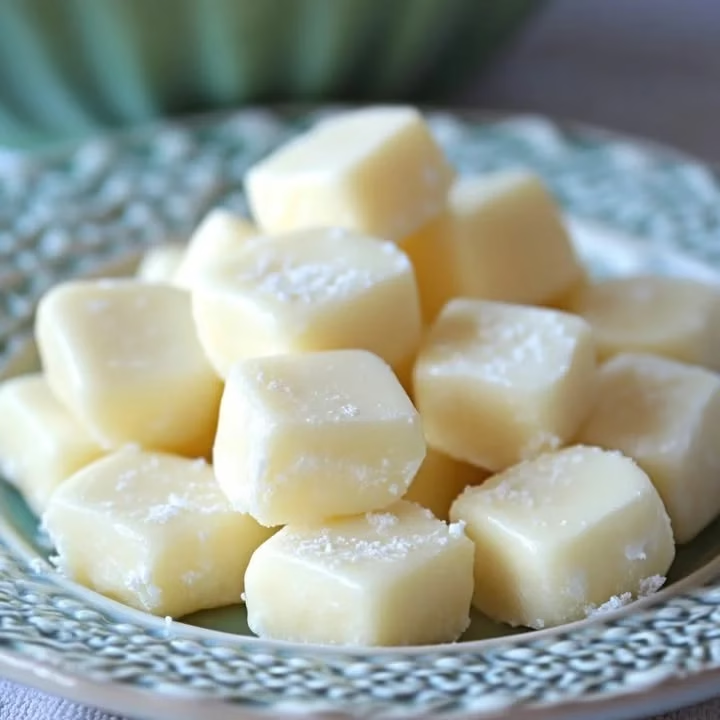
Homemade Butter Mints: A Sweet Treat for Any Occasion
If you’re looking for a delightful way to add a dash of sweetness to your gatherings, Homemade Butter Mints are the answer! These little mints are not just any old after-dinner candy; they’re soft, creamy, and melt-in-your-mouth delicious. Perfect for holiday parties, baby showers, or just because it’s Tuesday, they add a touch of warmth and nostalgia to any setting. Let’s dive into why you’ll love making these delectable little gems!
Why You’ll Love Homemade Butter Mints
Making your own Homemade Butter Mints is like wrapping up memories in a little minty package. They’re simple enough even for a busy weeknight, and they can charm your friends and family without breaking a sweat (or the bank!). Plus, there’s something liberating about whipping up a treat in your own kitchen—no mysterious ingredients or additives. Just good old-fashioned love and butter!
What You’ll Need
Before we jump into the minty madness, let’s gather our ingredients. Here’s what you’ll need to create your very own stash of Homemade Butter Mints:
Ingredients:
- 1/4 cup unsalted butter, softened
- 2-3 cups powdered sugar (yes, you heard right; that’s the sweet stuff!)
- 2 tablespoons milk
- 1 teaspoon peppermint extract (or any flavor you fancy!)
- A pinch of salt (because sweet things need a hug from salt too!)
- Food coloring (optional, but why not make them look as good as they taste?)
Let’s Get Cooking!
Ready to make some creamy, dreamy mints? Follow these easy steps, and you’ll be savoring your sweet creations in no time.
Instructions:
Mix It Up: In a mixing bowl, combine the softened butter and a pinch of salt. Using a hand mixer or a sturdy spoon, blend until smooth.
Add the Sweet Stuff: Gradually add 2 cups of powdered sugar and the milk. Mix until you get a dough-like consistency. If it’s too sticky, add a bit more powdered sugar until it’s manageable.
Flavor and Color: Stir in the peppermint extract (or your chosen flavor) and a few drops of food coloring if you’re feeling fancy!
Knead it Out: Dust your countertop with powdered sugar and turn out the dough. Knead gently until it’s soft and pliable.
Shape Your Mints: Roll the dough into small balls or flatten it to cut into shapes. Don’t stress about perfection; remember, homemade is about character (and maybe a touch of whimsy!).
Chill Time: Place the mints on a baking sheet lined with parchment paper and pop them into the fridge for at least 30 minutes. This step allows them to firm up. Plus, it gives you a little time to unwind (or maybe pour a glass of wine!).
Enjoy: Once they’re set and firm, your Homemade Butter Mints are ready to be enjoyed! Serve them in a cute bowl for guests or parcel them up as delightful gifts.
Cooking Tips and Tricks
Keep it Soft: If your mints are too hard, they can be warmed slightly in your hands before serving. No one wants to crack a tooth during a sweet moment!
Versatile Flavors: Experiment with different extracts like almond, vanilla, or even citrus for a fresh twist. Remember, variety is the spice of life—especially in the kitchen!
Storage Heaven: Store your mints in an airtight container at room temperature for up to a week. If they last that long, you’re amazing!
Personal Anecdotes
Let me take you back to a sweet moment in my kitchen. One holiday season, my sister, Patricia, and I were experimenting with mints when we accidentally created the fluffiest, creamiest batch. We giggled so much that we needed a mint ourselves just to keep from bursting into laughter! Not only did we end up with a delicious treat, but we also shared a beautiful memory.
Frequently Asked Questions
Can I substitute butter in this recipe?
Absolutely! You can use margarine, but keep in mind that the flavor may vary. If you’re feeling adventurous, coconut oil adds a delightful twist too!
How can I store leftovers?
Place your Homemade Butter Mints in an airtight container at room temperature or in the fridge. In theory, leftovers exist in the same universe where unicorns roam— but just in case!
Sweetening Up Your Life
Creating Homemade Butter Mints is a charming way to make your home feel a little sweeter. They’re easy, delightful, and a way to share a piece of your heart (and your kitchen!) with loved ones. So, whether you’re hosting a gathering, needing a last-minute gift, or just looking to treat yourself, whip up a batch of these mints and watch as your friends and family light up with joy.
Bonus Inspiration
If you enjoyed making these mints, why not take a peek at some more of my favorite recipes like Classic Chocolate Chip Cookies or Irresistible Fudge Brownies to add more sweetness to your baking repertoire?
Remember, sharing memories and delicious treats from your kitchen is the best recipe for love and laughter. Happy mint making!
Meta Description: Homemade Butter Mints are the perfect sweet treat for any occasion. Quick, easy, and delicious, these mints will steal the show! Try them today!
Homemade Butter Mints
Ingredients
Method
- In a mixing bowl, combine the softened butter and a pinch of salt. Blend until smooth.
- Gradually add 2 cups of powdered sugar and the milk. Mix until you get a dough-like consistency. If too sticky, add more powdered sugar.
- Stir in the peppermint extract and food coloring if desired.
- Dust the countertop with powdered sugar and turn out the dough. Knead gently until soft and pliable.
- Roll the dough into small balls or flatten it to cut into shapes.
- Place the mints on a baking sheet lined with parchment paper and refrigerate for at least 30 minutes.
- Once firm, your Homemade Butter Mints are ready to be served!